WooCommerce Plugin
Download
Latest [1.1.5]
Fliqa plugin is available for download below.
Plugin installation
- Download the zip file.
- Upload the plugin ZIP file to your WordPress admin panel: Plugins → Add Plugin → Upload Plugin → Choose File → Install Now.
- After installation, activate the plugin: Plugins → Installed Plugins → WooCommerce Fliqa Gateway -> Activate.
- Go to WooCommerce → Settings → Payments → Fliqa to configure.
Configuration Steps
Step 1 – Enable Plugin
Click Enable to activate the payment method.
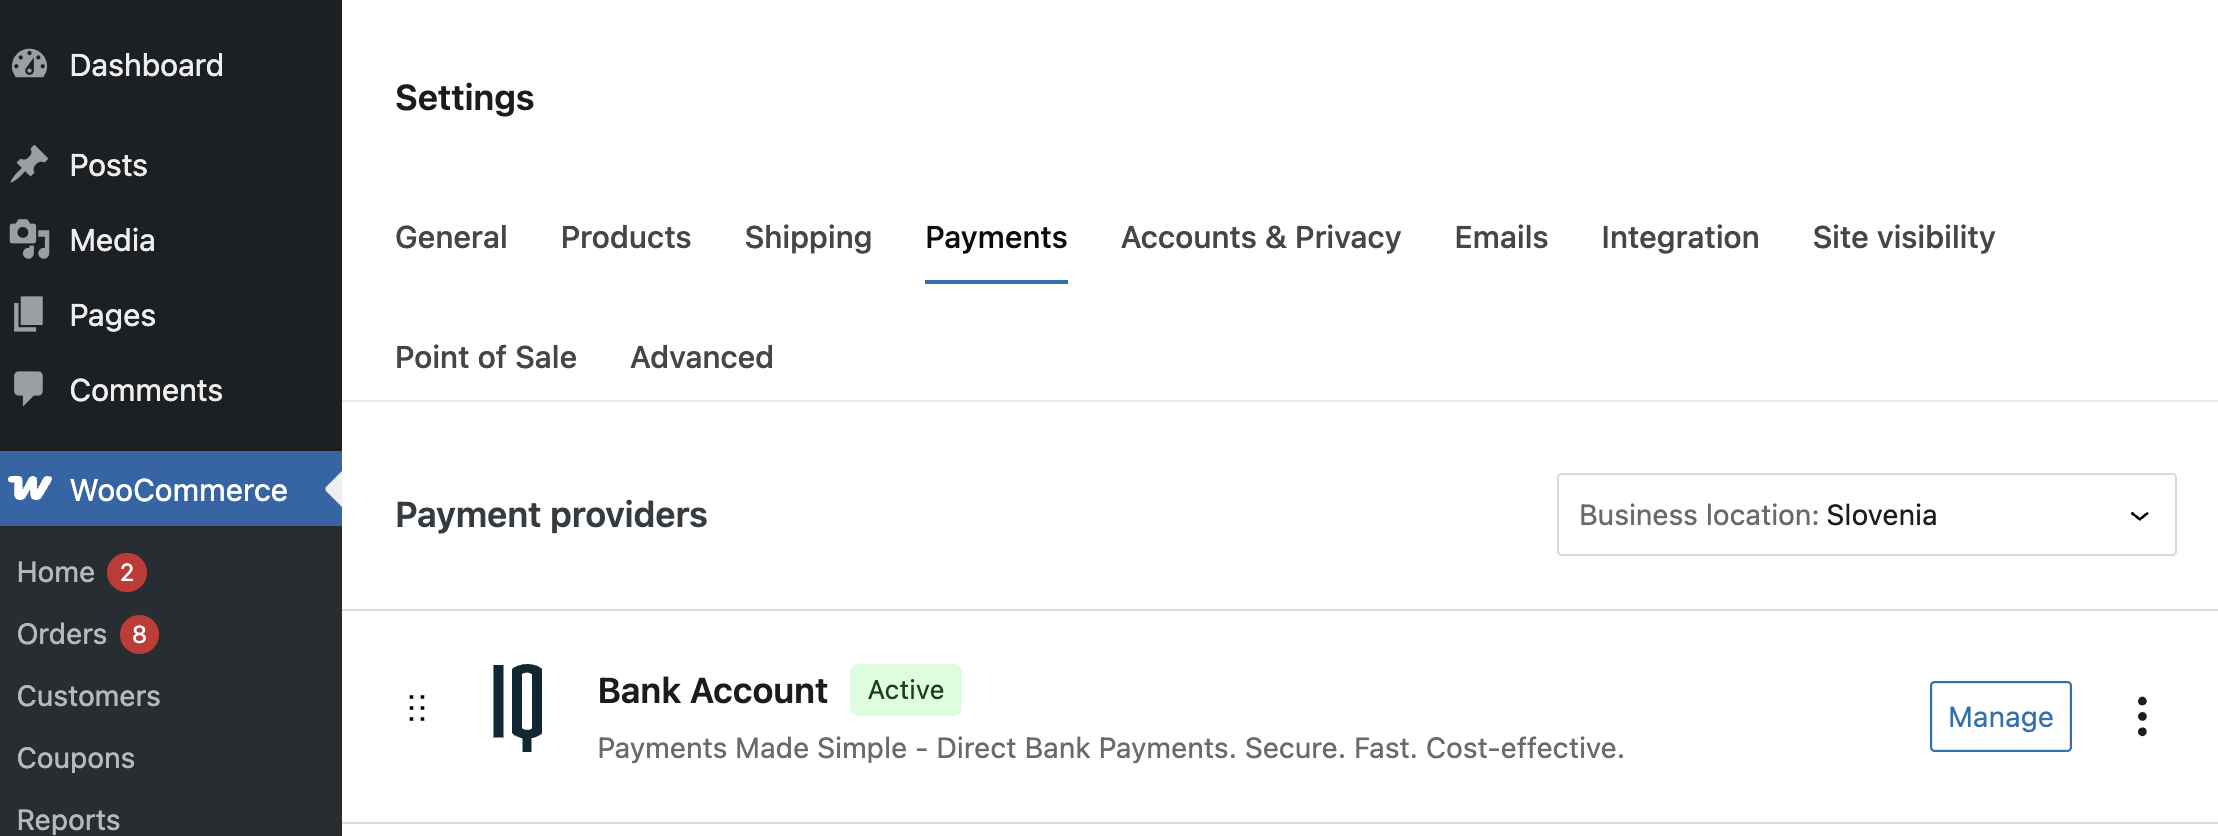
Click Manage to setup plugin
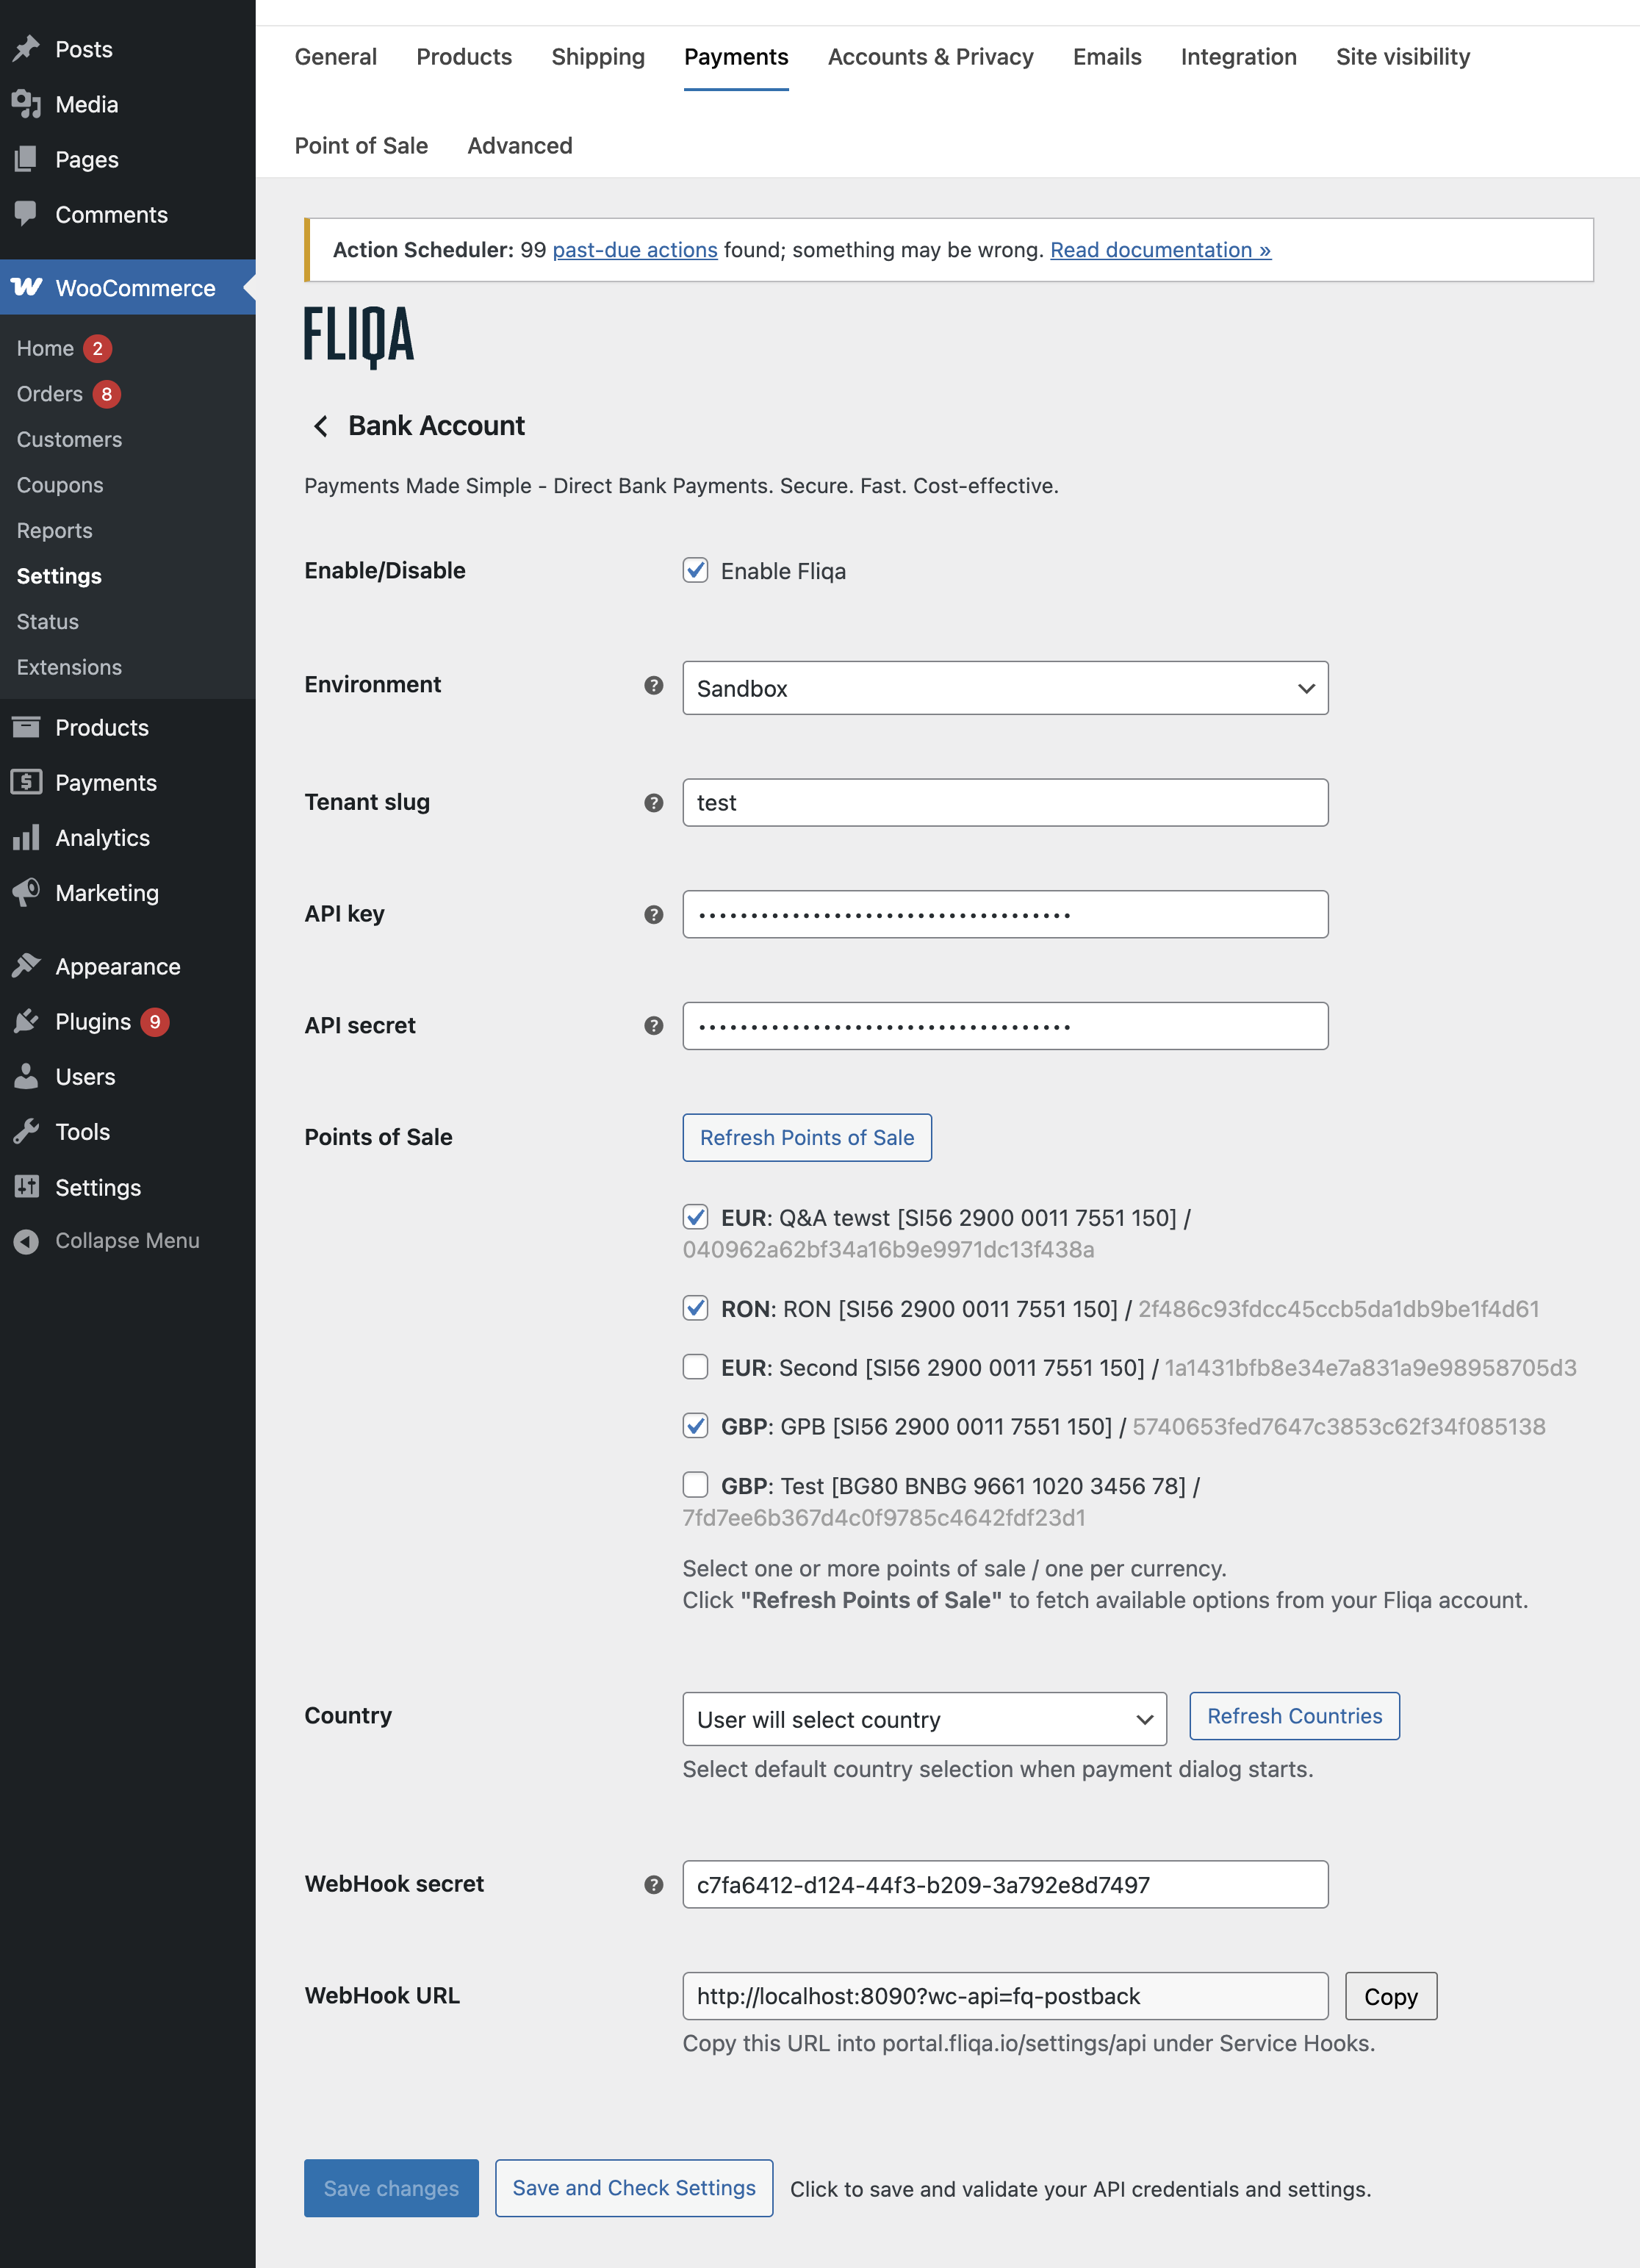
Step 2 – Select Environment
Choose the correct mode:
- Sandbox – for testing integration and payment flow.
- Production – for live payments.
Always validate API credentials in Sandbox first.
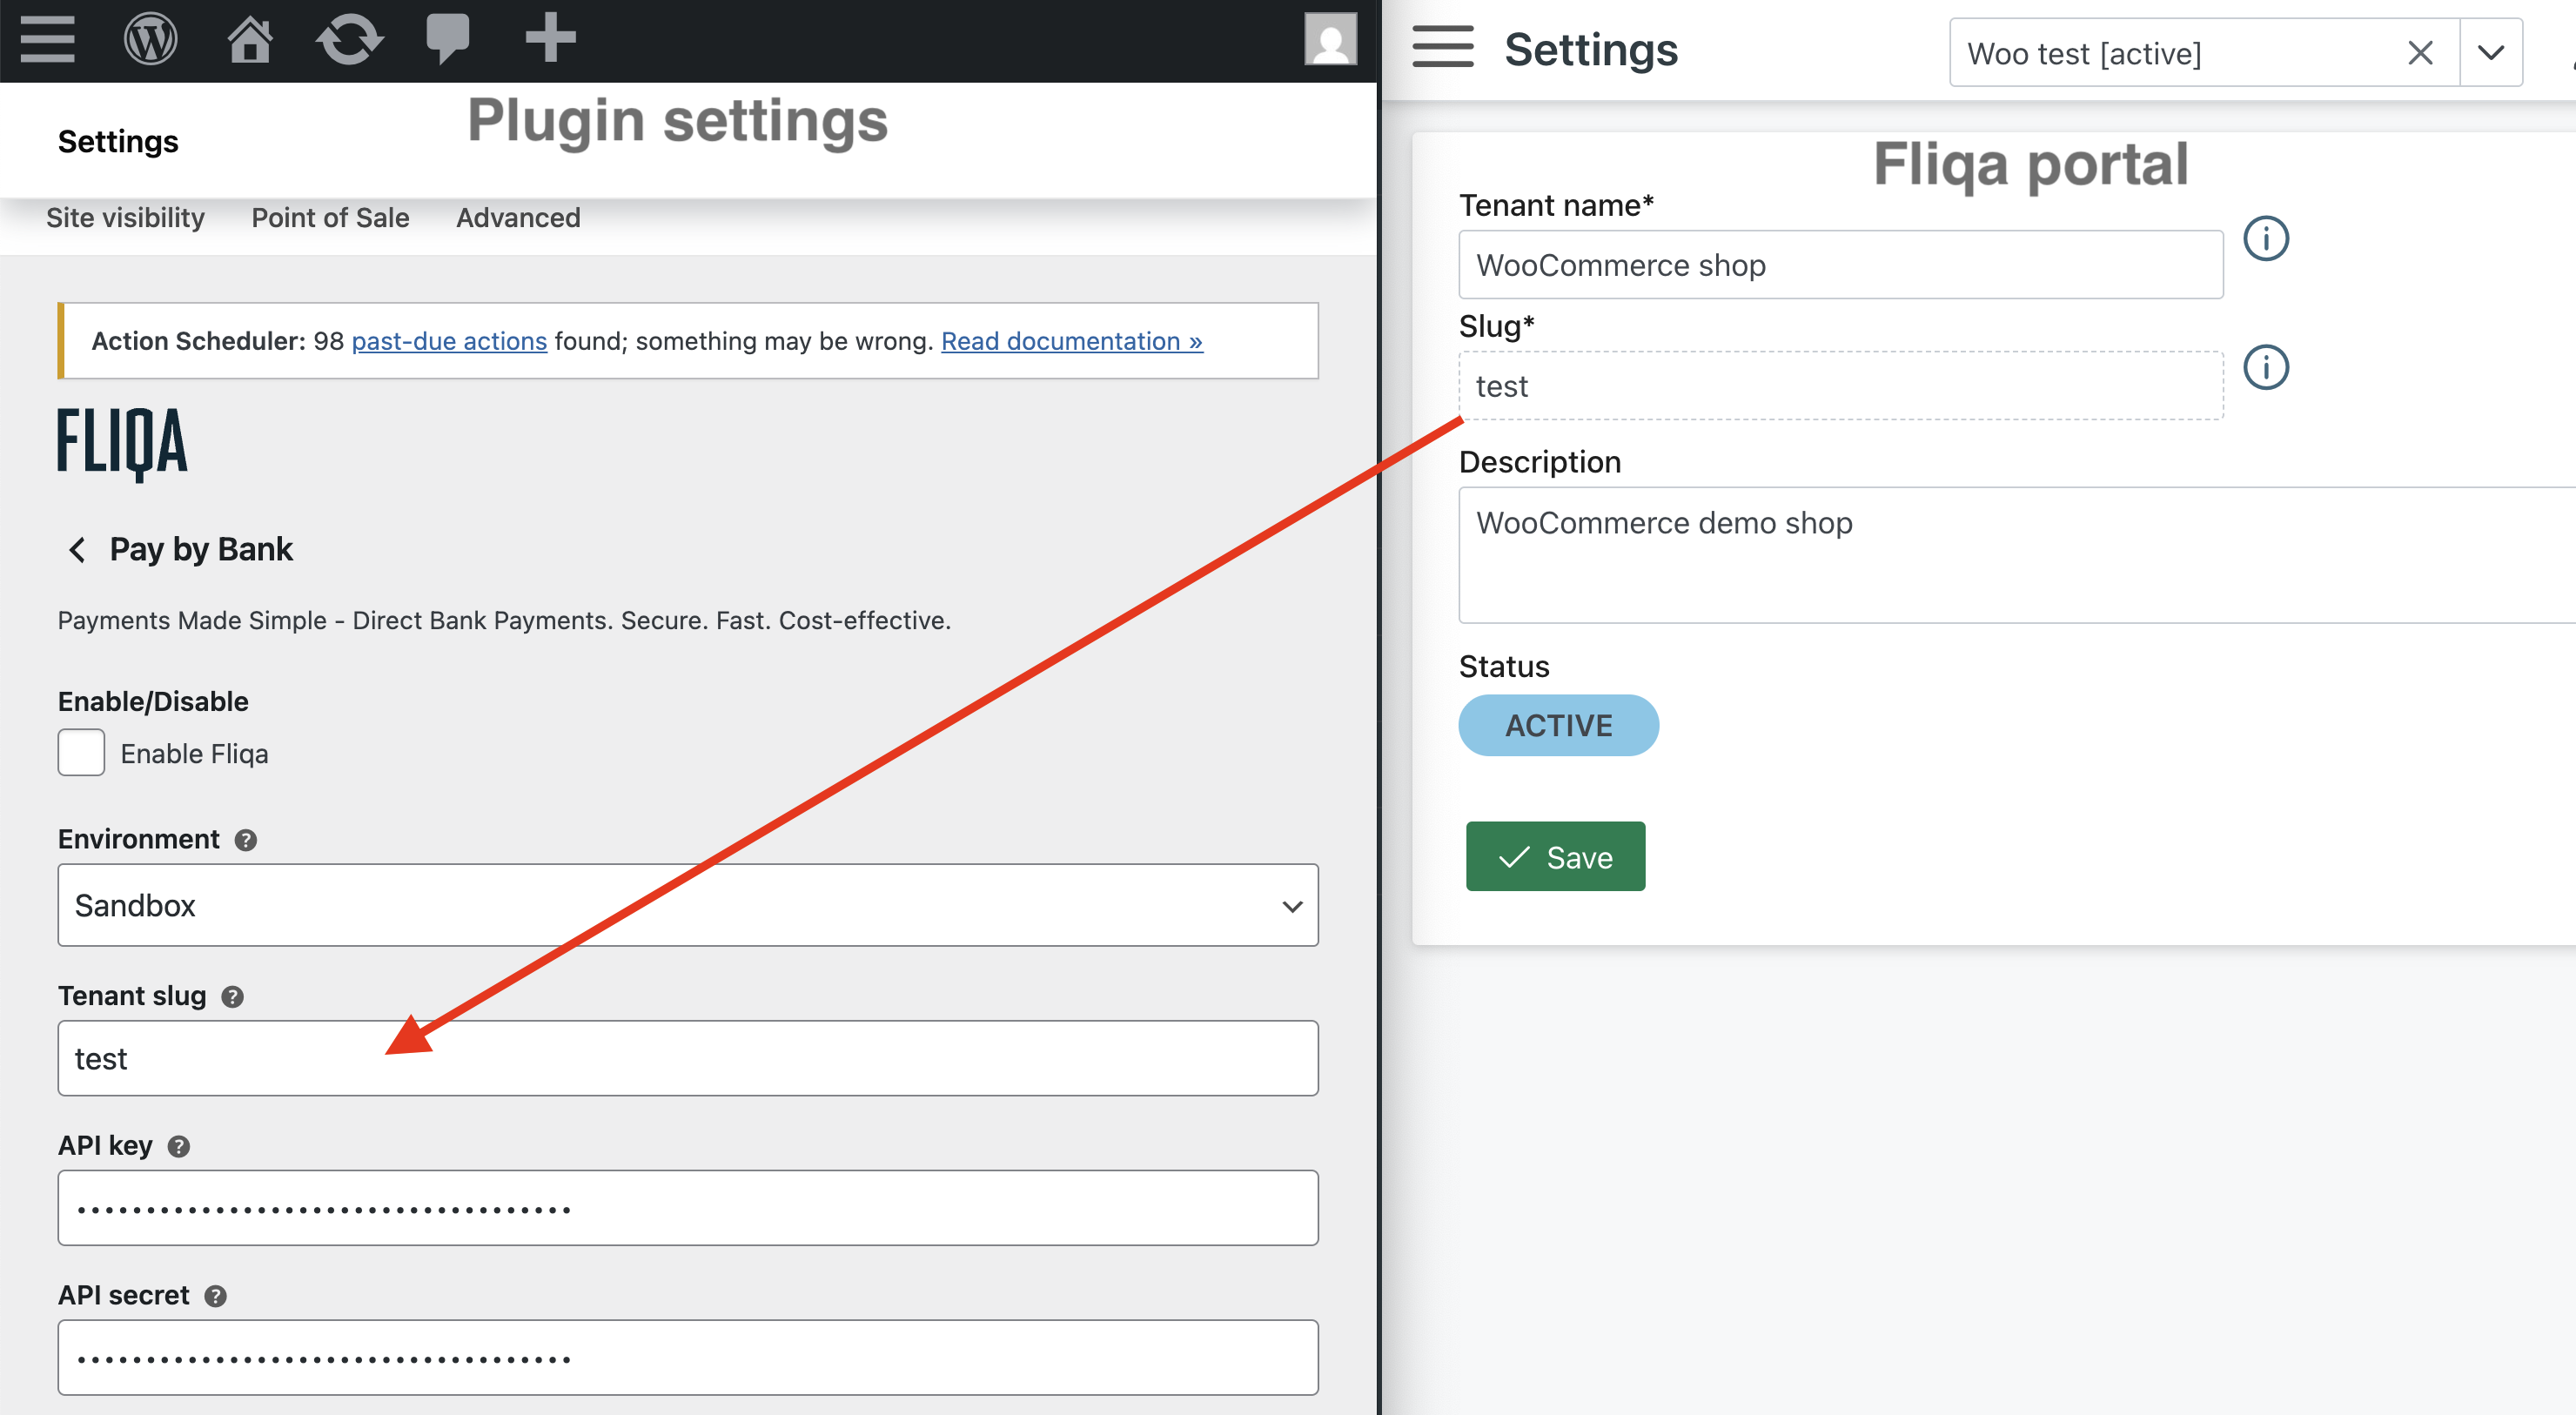
Step 3 – Tenant Slug
Enter your tenant slug (provided in your Fliqa portal under Settings) into
WooCommerce Fliqa plugin WooCommerce → Settings → Payments → Fliqa.
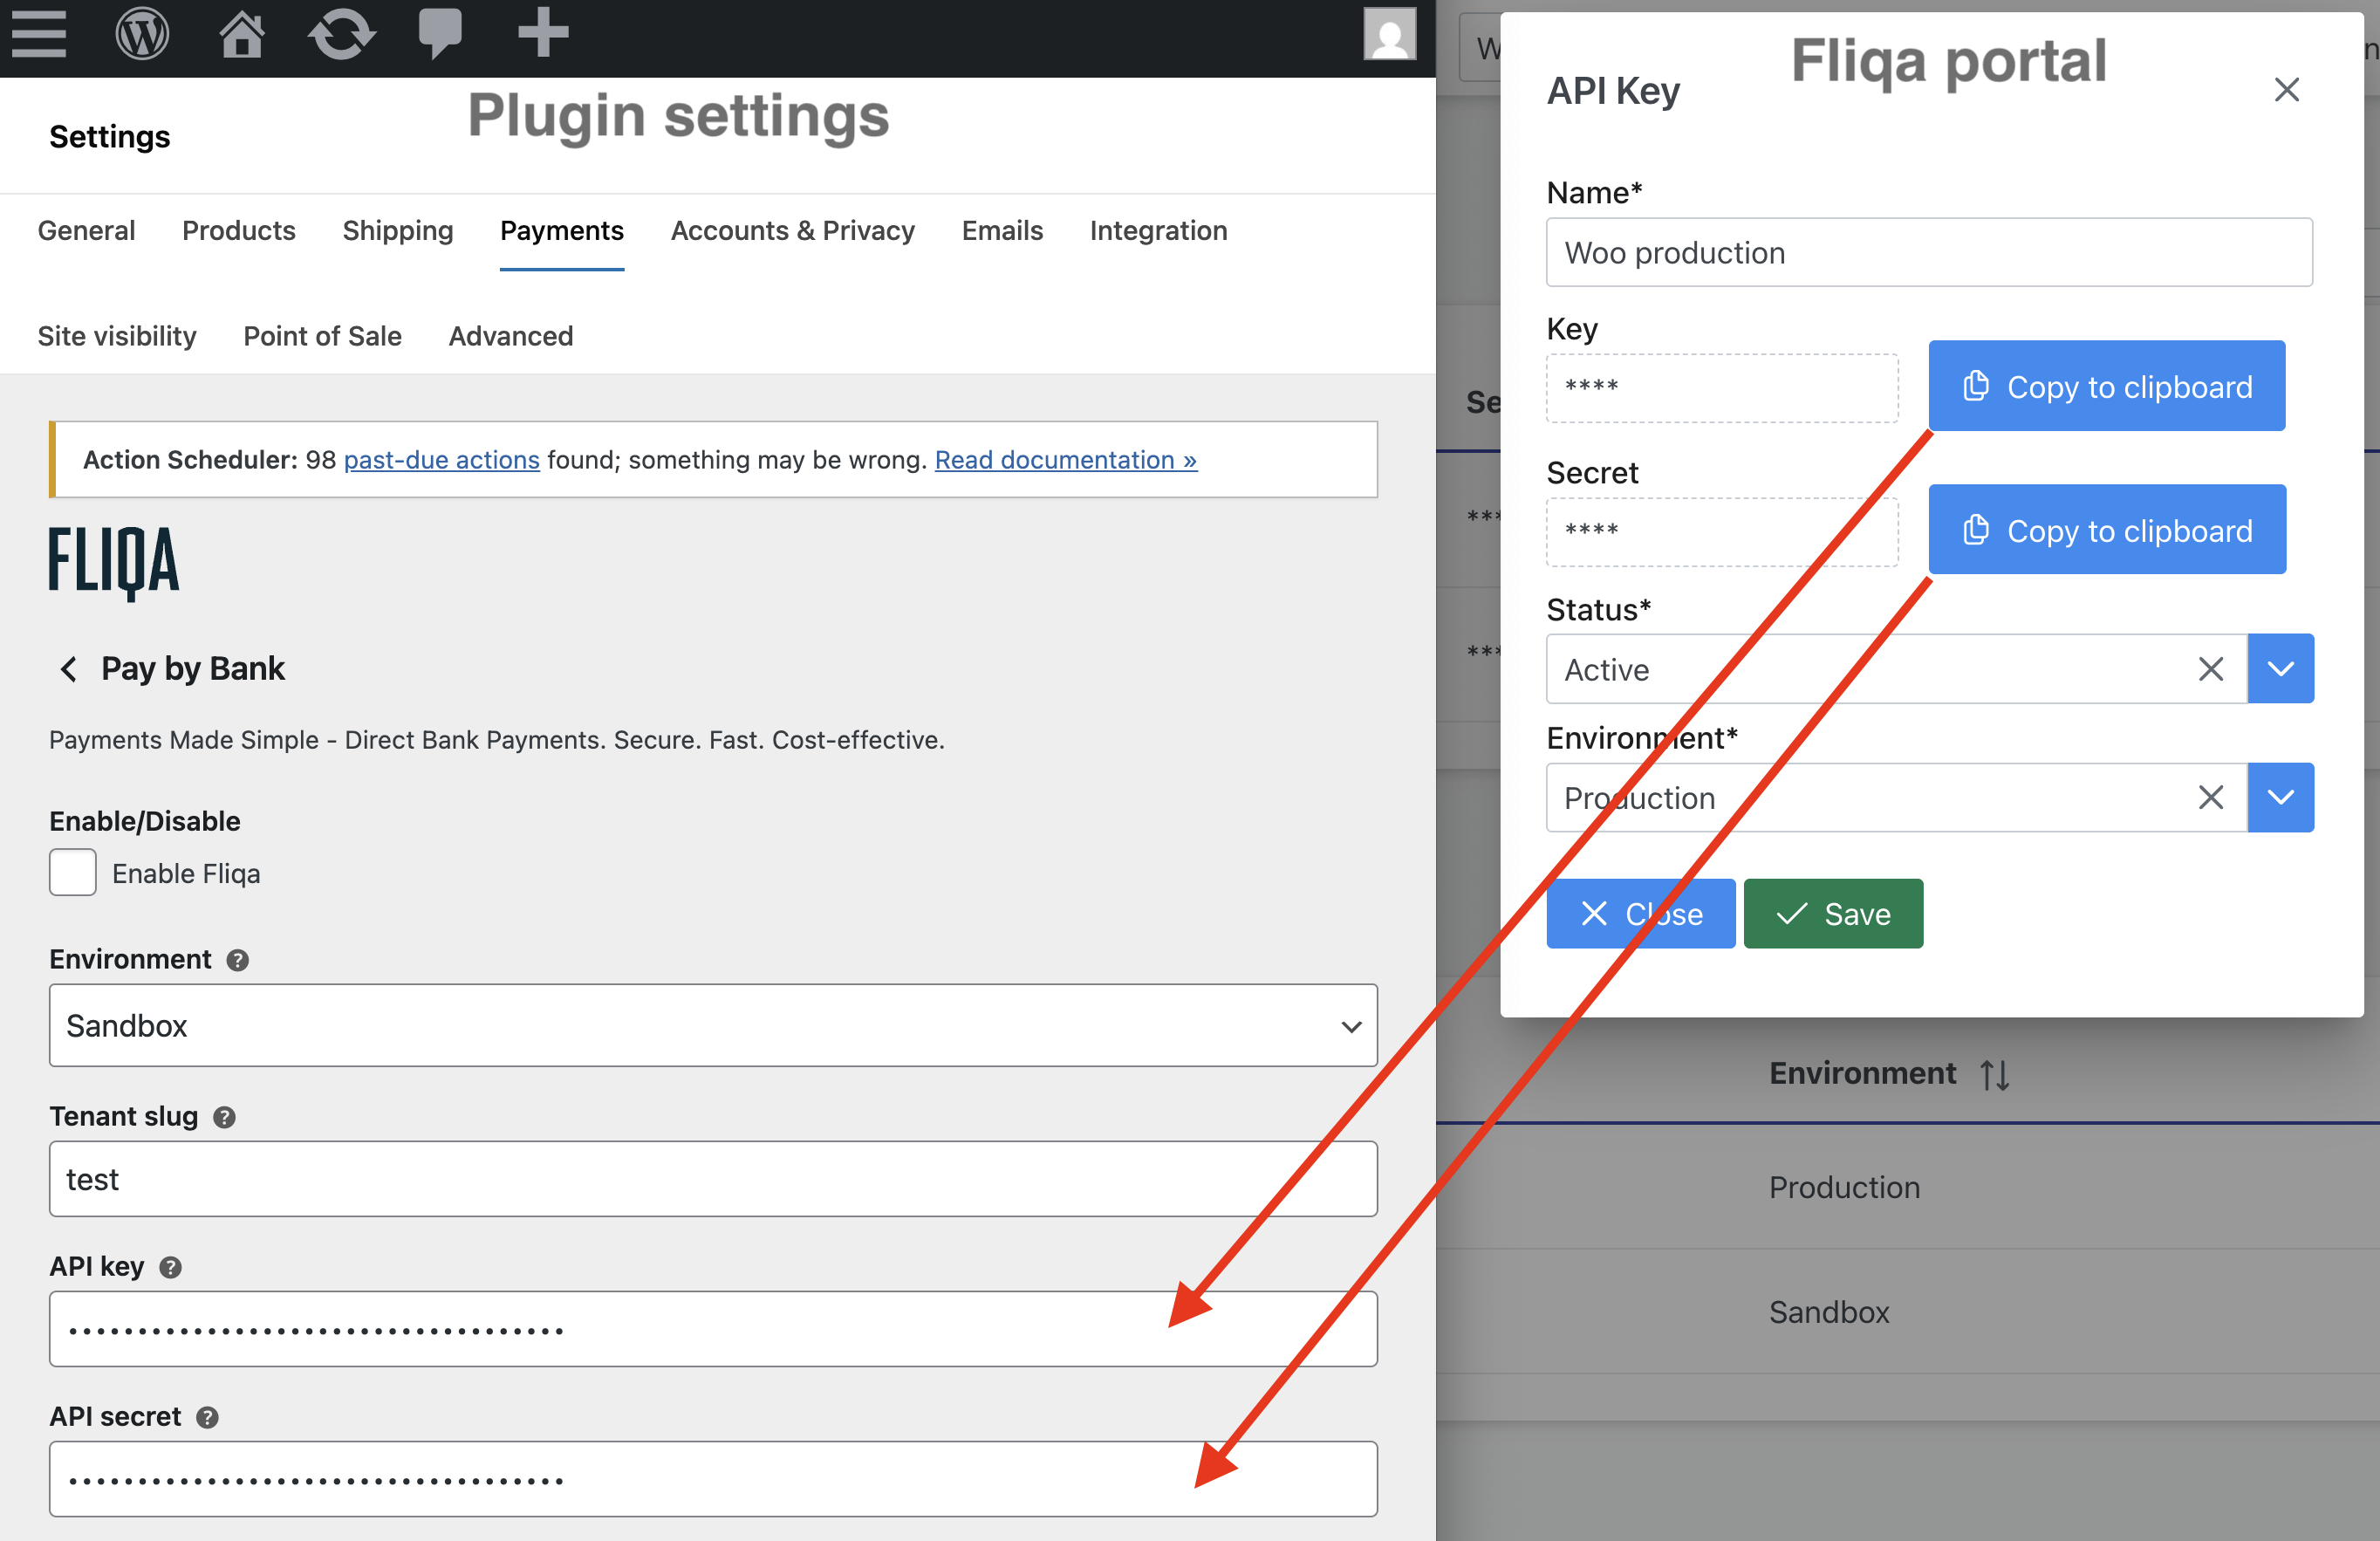
Step 4 – API Credentials
Create / Copy API Key and API Secret from the Fliqa portal from Settings → API settings into
WooCommerce Fliqa plugin WooCommerce → Settings → Payments → Fliqa.
Step 5 – Points of Sale (POS)
If credentials are correct Points of Sale can be listed
Note: Point of sale need to be configured in Fliqa portal first
Click Refresh Points of Sale to load your registered merchant IBANs.
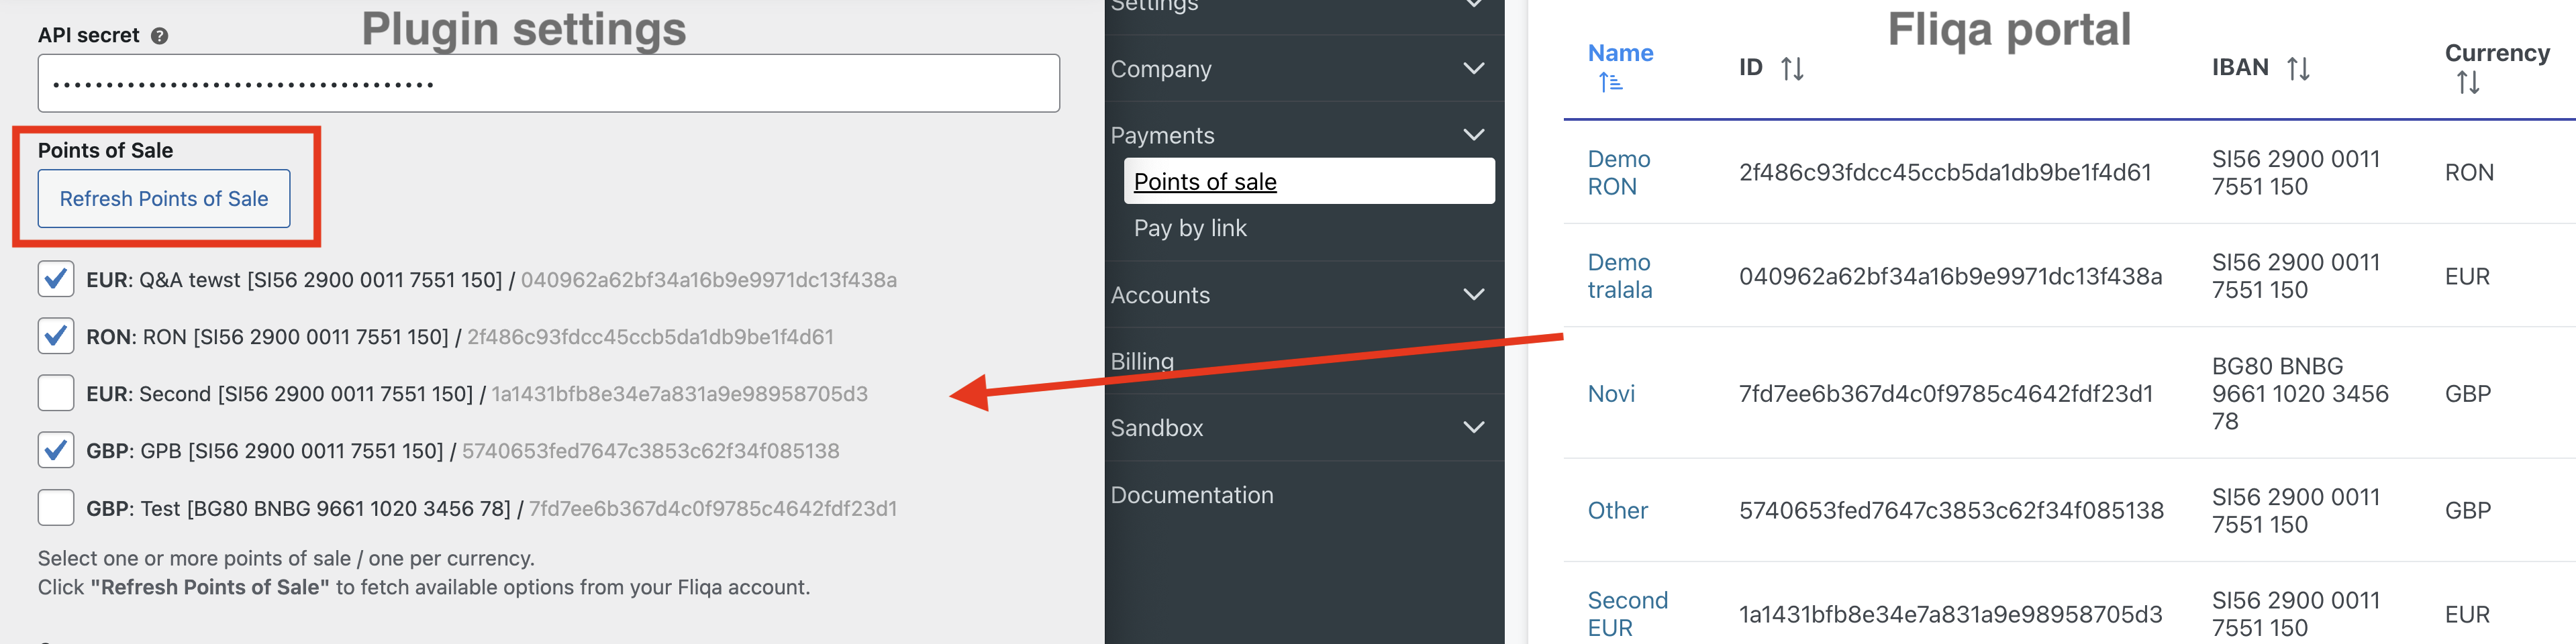
Select one or more Points of Sale (one per currency).
Points of sale are your verified merchant account for settlement. Funds are credited directly to this IBAN.
Step 6 – Country
Fliqa payment dialog can pre-select the country, select default behavior for country selection:
- Use country from order - shipping / billing address country will be used
- User will select country - customer will select country or
- Choose specific country - if your store operates in one market.
You can refresh available countries using Refresh Countries button
Step 7 – Webhook Configuration
In order to receive immediate payment status feedback we can configure a weebhook in Fliqa portal. Go to: Settings → API settings → Add Webhook and create a new payment web hook:
- Copy the Webhook URL displayed on plugin page into Fliqa (e.g.
http://yourdomain.com/?wc-api=fq-postback).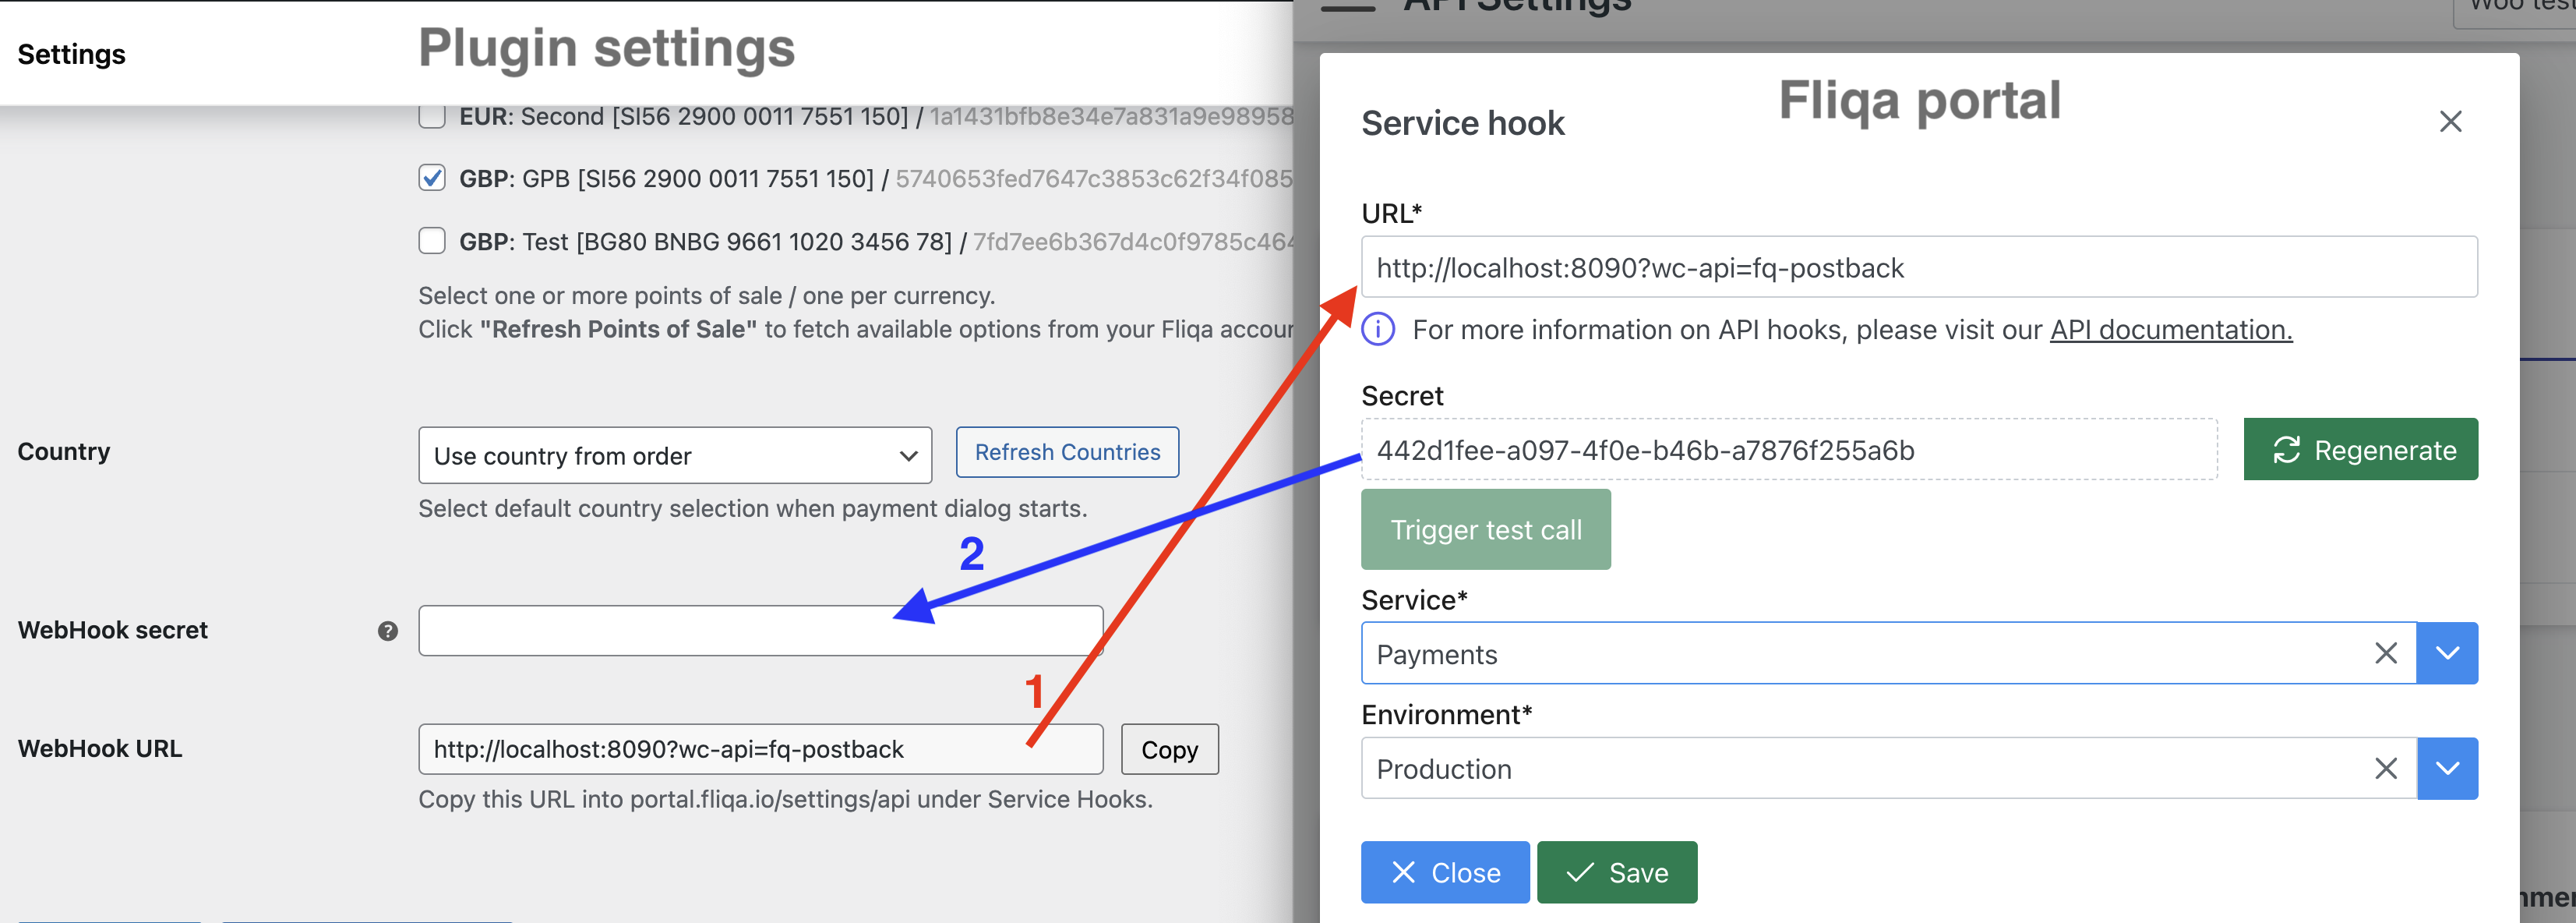
- Once hook is created copy webhook secret back into WooCommerce plugin
Webhooks are used for payment status updates (success, failed, ...).
Test Connection
Click Save and Check Settings
This validates your credentials and connection to the Fliqa API.
If successful, you'll see a confirmation notice and your POS list will populate.
Production Go-Live Checklist
Before switching from Sandbox to Production:
- Verify webhook URL configured in live portal for given environment.
- Confirm at least one live POS (IBAN) is active.
- Replace test API credentials with live keys.
- Perform a real transaction to validate flow and settlement.
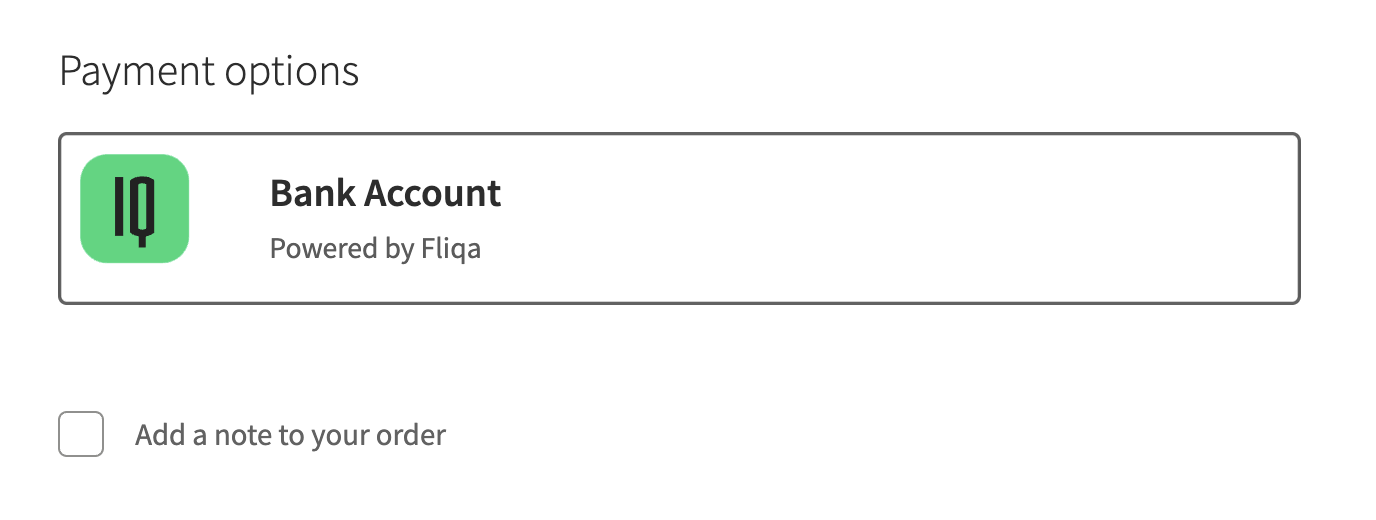
Checkout
If everything is configured correctly then the checkout will display Fliqa Bank Account as a checkout option.
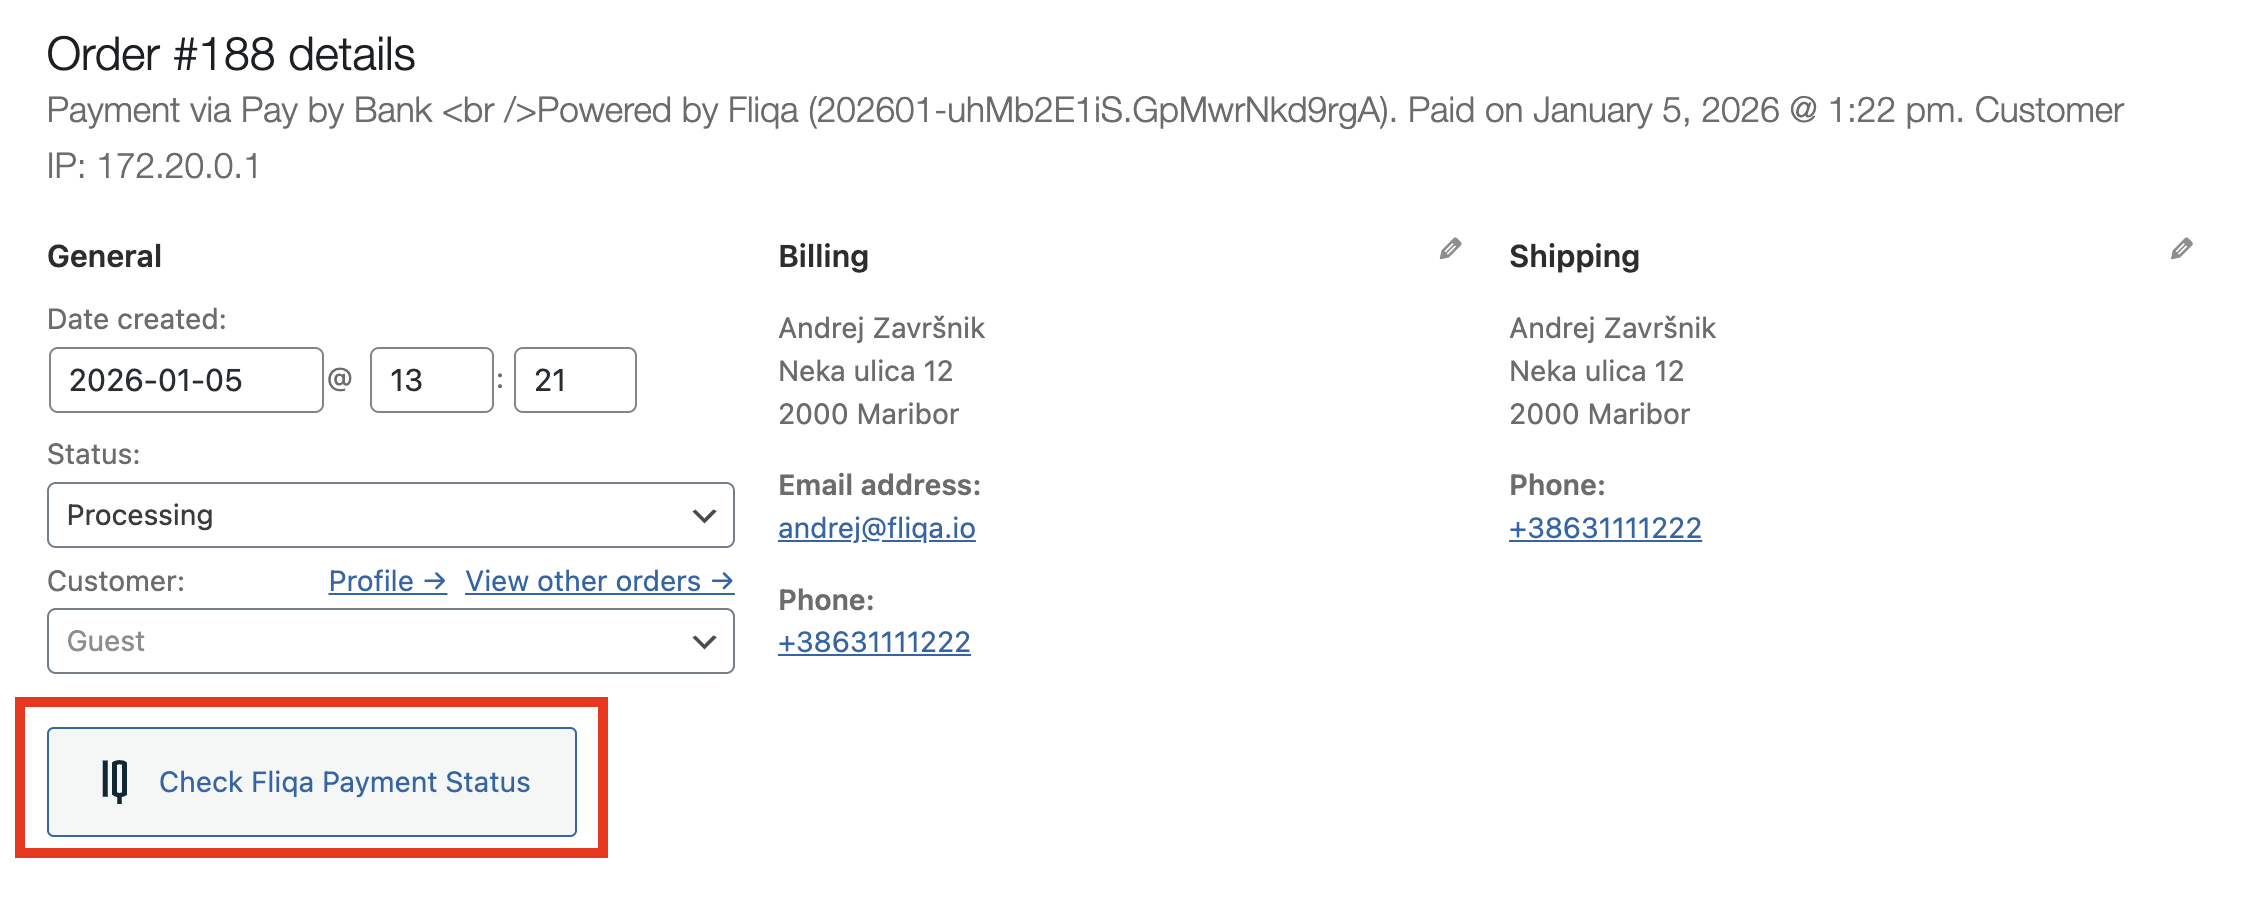
Order view
In order details the payment status can also be checked manually